How to Grow Microgreens at Home | Inhydro
Microgreens System is an easy, affordable way to enjoy fresh, healthy microgreens from the comfort of your own home. Microgreens are nutrient-dense, flavorful greens that can be used in salads, soups, smoothies, sandwiches, and more. With the right setup, anyone can learn how to grow their own microgreens and reap the benefits of having a constant supply of fresh produce. In this blog post, we will discuss the basics of growing microgreens at home and provide step-by-step instructions to get you started with your own Microgreens System.
What are microgreens?
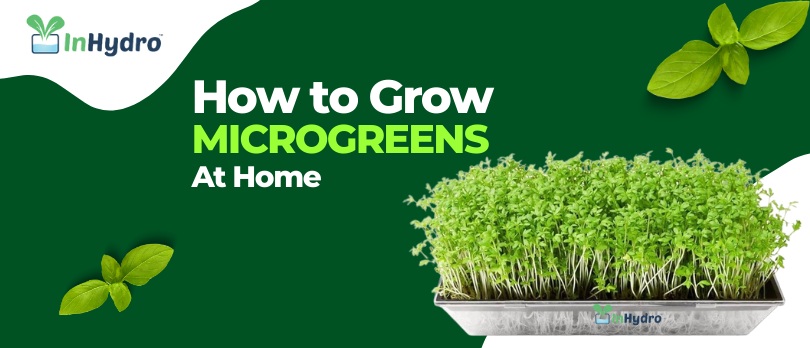
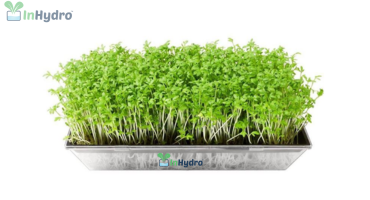
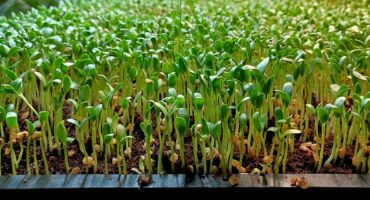
Microgreens are young seedlings, usually harvested around 1 to 3 weeks after germination. These tiny vegetable plants are incredibly nutritious, packing an abundance of flavor and nutrition into their small size. They are typically harvested from a variety of vegetables, grains, herbs and edible flowers. Microgreens can be grown in soil or with the use of a hydroponic microgreens system. Hydroponic microgreen systems are an easy way to produce large quantities of fresh microgreens without soil or other mediums. The hydroponic system uses nutrient-rich water and specialized equipment to provide the necessary environment for growth and development. With a hydroponic system, you can have fresh, nutrient-rich microgreens year-round, without the hassle of growing them in soil.
The benefits of growing microgreens
Microgreens are a type of green, edible plant that is harvested soon after the seed sprouts. They’re packed with vitamins, minerals, and antioxidants and make a great addition to salads, smoothies, sandwiches, and more. Plus, they’re very easy to grow, making them perfect for home gardeners. There are several different ways to grow microgreens, but using a hydroponic Microgreens system is one of the most efficient methods.
A hydroponic system uses nutrient-rich water instead of soil to grow plants. With this method, the plants receive the exact amount of nutrients they need to thrive without any soil or mess. This makes it easier to control their growth conditions, leading to faster and more consistent yields.
Not only is it easier to control the growth conditions with a Hydroponic Microgreens System, but it’s also much easier to maintain as well. Instead of having to water your plants regularly and weed out unwanted plants from the soil, you can simply turn on the pump in the system and allow the nutrient solution to flow through the containers. This eliminates the need for constant maintenance and makes it easier to get a consistent yield of microgreens each time.
Using a hydroponic Microgreens system also gives you more space for planting than traditional soil-based methods. With this system, you can have multiple trays of plants all receiving the same optimal conditions. This means you can grow more plants at once without having to worry about overcrowding or wasted space.
Overall, using a hydroponic microgreens system is a great way to get consistently high yields of healthy microgreens. Not only is it easy to maintain and provide optimal conditions for growth, but it also requires less space and effort than traditional soil-based methods. If you’re looking to get started growing microgreens at home, this may be the perfect option for you.
Setting up your microgreen system
Growing microgreens at home is a fun and easy way to add a healthy dose of nutrition to your diet. Before you can start planting, you need to make sure you have the right setup for growing your microgreens. Here’s a guide to help you get started.
First, you will need to select a container or tray for your microgreen setup. You can use almost any type of container or tray that is deep enough to hold soil and seeds. The most popular option is a shallow plastic or metal tray with drainage holes in the bottom. These trays come in various sizes so you can choose one that fits your space.
Once you have chosen a container, fill it with a nutrient-rich potting soil mix. Make sure you are using a mix that is specifically designed for microgreens since it needs to be light and airy. You should also add some fertilizer to the soil if desired.
After your container is filled with soil, it’s time to sow your microgreen seeds. Spread the seeds evenly across the top of the soil and lightly press them down into the surface. Make sure the seeds are evenly spaced apart so they will have room to grow.
Finally, water your microgreen setup until the soil is evenly moistened. You can then cover the container with a lid or plastic wrap to keep the moisture in and place it in an area where it will get plenty of indirect sunlight. Your microgreens should be ready to harvest in just 7-14 days!
Planting your microgreen seeds
Planting your Microgreen Seeds is a relatively simple process. Before getting started, you will need to decide what type of microgreens you would like to grow. This will determine the type of seeds you will need to purchase. Once you have your seeds in hand, it’s time to get started!
The first step is to prepare the soil for planting. The best soil for growing microgreens is a combination of potting soil and compost. For each tray, mix 2-3 parts potting soil with 1 part compost and then fill the tray up with the mixture. Be sure to leave enough room at the top of the tray for water and seed planting.
Once your soil is prepared, it’s time to plant your seeds. Start by scattering the seeds across the top of the soil, ensuring that there are no gaps between the seeds. Then, lightly press the seeds into the soil so they make contact with the soil underneath. You may also want to cover the seeds with a thin layer of vermiculite or compost to help keep them moist while they are germinating.
Once your seeds are planted, water them lightly using a spray bottle or watering can. Microgreens need to be kept consistently moist but be careful not to overwater as this can lead to root rot. Keep your trays out of direct sunlight and keep them in an area with plenty of airflow to help prevent mold or mildew growth.
With just a bit of effort, you can easily start growing delicious and nutritious microgreens right in your own home. Good luck and enjoy!
Caring for your microgreens
Once your microgreens are planted, you will need to provide them with proper care and maintenance. The following tips will help keep your microgreens in optimal condition:
Light: Microgreens need plenty of sunlight to grow. You can use artificial lighting to supplement the sunlight if necessary, but it should be placed no more than 2-3 inches above the plants.
Water: Watering is an essential part of caring for your microgreens. To ensure they get the moisture they need, water your microgreens regularly using a watering can or spray bottle. Make sure to avoid overwatering, which can cause the roots to rot.
Nutrients: Microgreens need access to nutrients to stay healthy. You can feed your microgreens a nutrient-rich fertilizer at least once every two weeks. Organic fertilizers such as fish emulsion are ideal for this purpose.
Pest control: Pests can easily damage your microgreens, so it’s important to keep an eye out for signs of infestation and treat it immediately. Natural methods such as handpicking or spraying with neem oil are effective ways to get rid of any pests.
Harvesting: When your microgreens are ready to harvest, you should cut them close to the soil line with a sharp pair of scissors or kitchen shears. Be sure to only harvest what you plan on eating, as microgreens don’t store well and should be eaten within a few days of being harvested.
By providing your microgreens with the proper care, you can enjoy fresh and nutritious greens all year round!
Harvesting your microgreens
Once your microgreens are fully grown and ready for harvest, you can start to reap the rewards of your hard work. The best time to harvest is when the first set of true leaves emerge, as this is when the microgreens have reached their peak flavor and nutritional value.
It is best to harvest your microgreens with scissors or a sharp knife so as to not damage the plants. When harvesting, cut just above the soil line at the base of the stems. Make sure to use clean tools and avoid handling the microgreens with your hands as much as possible.
Once harvested, your microgreens can be used immediately in salads, sandwiches, soups, smoothies, or other recipes. You can also store them for later use by placing them in an airtight container lined with a paper towel and storing them in the refrigerator. Microgreens can be stored for up to one week.
Harvesting your microgreens is a satisfying experience that allows you to enjoy the fruits of your labor. Whether you’re using them for culinary purposes or simply growing them for aesthetic value, microgreens are a great addition to any home garden.
Thank you for your interest in InHydro! Whether you have questions about our hydroponics products, services and solutions or want to learn more about hydroponics, we’re here to help. Please feel free to reach out to us using the contact information below, and one of our friendly team members will be in touch with you shortly.

How to Grow Microgreens at Home | Inhydro
Microgreens System is an easy, affordable way to enjoy fresh, healthy microgreens from the comfort of your own home. Microgreens are nutrient-dense, flavorful greens that can be used in salads, soups, smoothies, sandwiches, and more. With the right setup, anyone can learn how to grow their own microgreens and reap the benefits of having a constant supply of fresh produce. In this blog post, we will discuss the basics of growing microgreens at home and provide step-by-step instructions to get you started with your own Microgreens System.
What are microgreens?
Microgreens are young seedlings, usually harvested around 1 to 3 weeks after germination. These tiny vegetable plants are incredibly nutritious, packing an abundance of flavor and nutrition into their small size. They are typically harvested from a variety of vegetables, grains, herbs and edible flowers. Microgreens can be grown in soil or with the use of a hydroponic microgreens system. Hydroponic microgreen systems are an easy way to produce large quantities of fresh microgreens without soil or other mediums. The hydroponic system uses nutrient-rich water and specialized equipment to provide the necessary environment for growth and development. With a hydroponic system, you can have fresh, nutrient-rich microgreens year-round, without the hassle of growing them in soil.
The benefits of growing microgreens
Microgreens are a type of green, edible plant that is harvested soon after the seed sprouts. They’re packed with vitamins, minerals, and antioxidants and make a great addition to salads, smoothies, sandwiches, and more. Plus, they’re very easy to grow, making them perfect for home gardeners. There are several different ways to grow microgreens, but using a hydroponic Microgreens system is one of the most efficient methods.
A hydroponic system uses nutrient-rich water instead of soil to grow plants. With this method, the plants receive the exact amount of nutrients they need to thrive without any soil or mess. This makes it easier to control their growth conditions, leading to faster and more consistent yields.
Not only is it easier to control the growth conditions with a Hydroponic Microgreens System, but it’s also much easier to maintain as well. Instead of having to water your plants regularly and weed out unwanted plants from the soil, you can simply turn on the pump in the system and allow the nutrient solution to flow through the containers. This eliminates the need for constant maintenance and makes it easier to get a consistent yield of microgreens each time.
Using a hydroponic Microgreens system also gives you more space for planting than traditional soil-based methods. With this system, you can have multiple trays of plants all receiving the same optimal conditions. This means you can grow more plants at once without having to worry about overcrowding or wasted space.
Overall, using a hydroponic microgreens system is a great way to get consistently high yields of healthy microgreens. Not only is it easy to maintain and provide optimal conditions for growth, but it also requires less space and effort than traditional soil-based methods. If you’re looking to get started growing microgreens at home, this may be the perfect option for you.

Setting up your microgreen system
Growing microgreens at home is a fun and easy way to add a healthy dose of nutrition to your diet. Before you can start planting, you need to make sure you have the right setup for growing your microgreens. Here’s a guide to help you get started.
First, you will need to select a container or tray for your microgreen setup. You can use almost any type of container or tray that is deep enough to hold soil and seeds. The most popular option is a shallow plastic or metal tray with drainage holes in the bottom. These trays come in various sizes so you can choose one that fits your space.
Once you have chosen a container, fill it with a nutrient-rich potting soil mix. Make sure you are using a mix that is specifically designed for microgreens since it needs to be light and airy. You should also add some fertilizer to the soil if desired.
After your container is filled with soil, it’s time to sow your microgreen seeds. Spread the seeds evenly across the top of the soil and lightly press them down into the surface. Make sure the seeds are evenly spaced apart so they will have room to grow.
Finally, water your microgreen setup until the soil is evenly moistened. You can then cover the container with a lid or plastic wrap to keep the moisture in and place it in an area where it will get plenty of indirect sunlight. Your microgreens should be ready to harvest in just 7-14 days!
Planting your microgreen seeds
Planting your Microgreen Seeds is a relatively simple process. Before getting started, you will need to decide what type of microgreens you would like to grow. This will determine the type of seeds you will need to purchase. Once you have your seeds in hand, it’s time to get started!
The first step is to prepare the soil for planting. The best soil for growing microgreens is a combination of potting soil and compost. For each tray, mix 2-3 parts potting soil with 1 part compost and then fill the tray up with the mixture. Be sure to leave enough room at the top of the tray for water and seed planting.
Once your soil is prepared, it’s time to plant your seeds. Start by scattering the seeds across the top of the soil, ensuring that there are no gaps between the seeds. Then, lightly press the seeds into the soil so they make contact with the soil underneath. You may also want to cover the seeds with a thin layer of vermiculite or compost to help keep them moist while they are germinating.
Once your seeds are planted, water them lightly using a spray bottle or watering can. Microgreens need to be kept consistently moist but be careful not to overwater as this can lead to root rot. Keep your trays out of direct sunlight and keep them in an area with plenty of airflow to help prevent mold or mildew growth.
With just a bit of effort, you can easily start growing delicious and nutritious microgreens right in your own home. Good luck and enjoy!
Caring for your microgreens
Once your microgreens are planted, you will need to provide them with proper care and maintenance. The following tips will help keep your microgreens in optimal condition:
Light: Microgreens need plenty of sunlight to grow. You can use artificial lighting to supplement the sunlight if necessary, but it should be placed no more than 2-3 inches above the plants.
Water: Watering is an essential part of caring for your microgreens. To ensure they get the moisture they need, water your microgreens regularly using a watering can or spray bottle. Make sure to avoid overwatering, which can cause the roots to rot.
Nutrients: Microgreens need access to nutrients to stay healthy. You can feed your microgreens a nutrient-rich fertilizer at least once every two weeks. Organic fertilizers such as fish emulsion are ideal for this purpose.
Pest control: Pests can easily damage your microgreens, so it’s important to keep an eye out for signs of infestation and treat it immediately. Natural methods such as handpicking or spraying with neem oil are effective ways to get rid of any pests.
Harvesting: When your microgreens are ready to harvest, you should cut them close to the soil line with a sharp pair of scissors or kitchen shears. Be sure to only harvest what you plan on eating, as microgreens don’t store well and should be eaten within a few days of being harvested.
By providing your microgreens with the proper care, you can enjoy fresh and nutritious greens all year round!
Harvesting your microgreens
Once your microgreens are fully grown and ready for harvest, you can start to reap the rewards of your hard work. The best time to harvest is when the first set of true leaves emerge, as this is when the microgreens have reached their peak flavor and nutritional value.
It is best to harvest your microgreens with scissors or a sharp knife so as to not damage the plants. When harvesting, cut just above the soil line at the base of the stems. Make sure to use clean tools and avoid handling the microgreens with your hands as much as possible.
Once harvested, your microgreens can be used immediately in salads, sandwiches, soups, smoothies, or other recipes. You can also store them for later use by placing them in an airtight container lined with a paper towel and storing them in the refrigerator. Microgreens can be stored for up to one week.
Harvesting your microgreens is a satisfying experience that allows you to enjoy the fruits of your labor. Whether you’re using them for culinary purposes or simply growing them for aesthetic value, microgreens are a great addition to any home garden.
Contact us at the Consulting WP office nearest to you or submit a business inquiry online.
Related Post
-
The Evolution of Hydroponics in India: InHydro Company’s Role
The Evolution of Hydroponics in India: InHydro Company’s Role India, a country with a rich agricultural heritage, is now witnessing a revolution in farming methods – hydroponics. This innovative approach to cultivation has the potential to reshape the Indian agricultural landscape. At the forefront of this evolution is InHydro, a pioneering hydroponics company in India. In this blog, we’ll explore the remarkable journey of hydroponics in India and the pivotal role played by InHydro in this transformation. The Early Stages: Hydroponics in India The concept of hydroponics, which involves growing plants without soil, was relatively unknown in India until a
11/10/2023
Read more -
The Future of Hydroponics in India: InHydro Company’s Vision
The Future of Hydroponics in India: InHydro Company’s Vision As the world grapples with increasing food demands, climate change, and limited arable land, the future of agriculture is undergoing a paradigm shift. In India, where agriculture is a cornerstone of the economy, hydroponics is emerging as a game-changer. InHydro, a pioneering hydroponics company in India, is at the forefront of this agricultural revolution. Let’s explore InHydro’s vision for the future of hydroponics in India. Agriculture Reinvented: InHydro’s Commitment InHydro envisions a future where agriculture in India is not constrained by traditional farming methods and limitations. Their commitment is to reinvent
11/10/2023
Read more -
Choosing the Right Hydroponics Company in India: A Buyer’s Guide
Choosing the Right Hydroponics Company in India: A Buyer’s Guide In the ever-evolving world of agriculture, hydroponics has emerged as a revolutionary method of cultivating crops. Hydroponic farming offers numerous advantages, from efficient space utilization to water conservation and year-round crop production. If you’re considering venturing into hydroponics in India, you’re embarking on a journey towards sustainable and high-yield farming. However, choosing the right hydroponics company is crucial to your success. In this buyer’s guide, we’ll explore essential factors to consider when selecting the best hydroponics company in India. Expertise in Hydroponic Farming First and foremost, look for a hydroponics
11/10/2023
Read more -
Why Inhydro tops the list of best hydroponics companies in India
Why Inhydro tops the list of best hydroponics companies in India In the ever-evolving landscape of agriculture, where sustainability and innovation are key, InHydro stands tall as the leading hydroponics company in India, redefining modern farming and setting standards for the industry. With a passion for growth and a commitment to providing holistic solutions, InHydro has emerged as the best hydroponics company in India, making it the go-to choice for farmers and agripreneurs alike. Cost-Effective Hydroponic Farming Solutions InHydro is committed to making hydroponics accessible to all. Their cost-effective solutions make setting up a hydroponic farm in India a reality
11/10/2023
Read more -
The Rise of Hydroponics for Sustainable Agriculture
Hydroponics is a modern and innovative method of growing plants without the need for soil. Instead, plants are grown in nutrient-rich water solutions, allowing them to absorb all the essential nutrients they need for healthy growth.
12/09/2023
Read more -
Choosing the Right Hydroponic System: Your Guide to Hydroponic Farming in India
Hydroponics is a modern and innovative method of growing plants without the need for soil. Instead, plants are grown in nutrient-rich water solutions, allowing them to absorb all the essential nutrients they need for healthy growth.
12/09/2023
Read more -
Introduction to Hydroponics: A Sustainable Farming Approach in India
Hydroponics is a modern and innovative method of growing plants without the need for soil. Instead, plants are grown in nutrient-rich water solutions, allowing them to absorb all the essential nutrients they need for healthy growth.
12/09/2023
Read more

Mr. Sandeep & Mrs. Asha
I am passionate about farming and want to do it as a hobby. I was searching for the right vendor I visited InHydro and was amazed to see they are manufacturing & building products using HDPE material. I bought 64 Plants NFT Systems for leafy and herbs along with 50 Dutch bucket systems for vine crops. Thank you Mr. Awneesh for your guidance.

Mr. Harshit Singhal
I am Harshit. This workshop refreshed me. It was meticulously planned. Each session had a good insight. Thanks to Mr. Awneesh Kumar and his team to have put up a good show. Keep spreading the knowledge sir.
-
Company Title #1
Item content. Click the edit button to change this text.
Company overview
Consulting WP is a global consulting powerhouse. We began our operations a few decades ago and have grown due to excellent relationships with our clients. We started out small, with just a few people and a small office, but today we have offices in multiple countries with hundreds of people working inside them.
We achieved our success because of how successfully we integrate with our clients. One complaint many people have about consultants is that they can be disruptive. Employees fear outside consultants coming in and destroying the workflow. Our clients face no such issues.
Consulting WP continues to grow ever day thanks to the confidence our clients have in us. We cover many industries such as financial, energy, business services, consumer products.
Our mission
Our renowned coaching programs will allow you to:
- Work fewer hours — and make more money
- Attract and retain quality, high-paying customers
- Manage your time so you’ll get more done in less time
- Hone sharp leadership skills to manage your team
- Cut expenses without sacrificing quality
- Automate your business, so you can leave for days, weeks, or even months at a time
How we work

Thank you for your interest in InHydro! Whether you have questions about our Hydroponics products, services & solutions or want to learn more about hydroponics, we’re here to help. Please feel free to reach out to us using the contact information below, and one of our friendly team members will be in touch with you shortly.
I am passionate about farming and want to do it as a hobby. I was searching for the right vendor I visited InHydro and was amazed to see they are manufacturing & building products using HDPE material. I bought 64 Plants NFT Systems for leafy and herbs along with 50 Dutch bucket systems for vine crops. Thank you Mr. Awneesh for your guidance.


